
React is a javascript UI rendering engine for building user interfaces from Facebook and the Instagram team. Most likely use as the V in the MVC design pattern, React makes no assumptions about the rest of your technology stack. This is a short tutorial on how to create a React component.
Intoduction
What is React?
React is a library for building composable user interfaces. It encourages the creation of reusable UI components which present data that changes over time.
Traditionally, web application UIs are built using templates or HTML directives. These templates dictate the full set of abstractions that you are allowed to use to build your UI.
React approaches building user interfaces differently by breaking them into components. This means React uses a real, full featured programming language to render views, which we see as an advantage over templates for a few reasons:
- JavaScript is a flexible, powerful programming language with the ability to build abstractions. This is incredibly important in large applications.
- By unifying your markup with its corresponding view logic, React can actually make views easier to extend and maintain.
- By baking an understanding of markup and content into JavaScript, there’s no manual string concatenation and therefore less surface area for XSS vulnerabilities.
We’ve also created JSX, an optional syntax extension, in case you prefer the readability of HTML to raw JavaScript.
– [React blog]
A Hello World example!
Look at the code below
Nothing unfamiliar, pure javacscript code with some fancy thing. You may notice some unwrapped «html» in the code
| |
You may say «the guy sucks, he can write a simple code right…» HA HA HA and no this is valid code in React called JSX Syntax.
JSX Syntax
[JSX] is a JavaScript syntax extension that looks similar to XML. You can use a simple JSX syntactic transform with React.
Why JSX?
You don’t have to use JSX with React. You can just use plain JS. However, we recommend using JSX because it is a concise and familiar syntax for defining tree structures with attributes.
It’s more familiar for casual developers such as designers.
XML has the benefit of balanced opening and closing tags. This helps make large trees easier to read than function calls or object literals.
It doesn’t alter the semantics of JavaScript.
A little bit more funny Hello World component
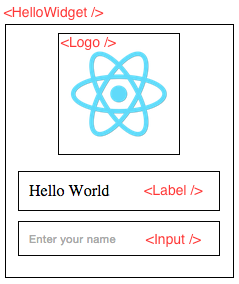
Lets make an Hello World widget with:
- A Logo represented by an image
- A label: to display Hello World your name
- An input box: to get the user input
So lets decompose this component with a picture:
So Lets go !!!
First clone the Github repo on your computer
React example<br>Repository
Create an index.html with the content of the following snippet
| |
The Logo component
Lets build the Logo component that consist of rendering an <img /> tag
| |
- First we create a local variable
Logo - Next we pass some methods in a JavaScript object to
React.createClass()to create a new React component. - Next we create a
propTypesobject to handling validation - Next we create the most important method for a component:
render - Next we return an image tag in JSX format with some attributes:
className: represent theclassattribute in HTML, because JSX is written directly in the javascript code you can’t use theclassbecause is a reserved keyword{...this.props}: this is a feature in React called [Transffering Props]. Sometimes is tedious to pass every property along, so the...<other>say to React to merge all the property inotherto the current component property
{...this.props} is the last attribute that means all attribute before will be overwritten. You will see another example for the Input component.{% comment %}
Warning: The Transfering Props use the Destructuring assignment feature in ES6
{% endalert%}
{% endcomment %}
The Label component
The label component consist of rendering a <p></p> element
| |
No big change from the previous section
- Create a Label component
- Implementing the
rendermethod - Return the UI composing the element
The Input component
The Input component consits of rendering an <input /> element
| |
Anything new but look at the {...this.props}. In the previous component the statement is the last attribute. Why ? In fact transfering property merge all attribute of an element if they are define when instanciating the component. Putting {...this.props} before type="text" ensure that the input is always a text input even if the component redefined the property.
Putting all together: Wrapping the Logo, Label and the Input
Lets wrap ours components
| |
Some new stuff:
- A new method:
getInitialState. In React component are state machines. React thinks of UIs as simple state machines. By thinking of a UI as being in various states and rendering those states, it’s easy to keep your UI consistent.
- We declare the
handleChangemethod that will update the state whenever you type in theInputcomponent. - Here its where the magic happen,
this.setState()will set the new state of the component. - We implement the render method
- We declare our
<Logo />component, and pass thesrcproperty to set the image source url. - We declare our
<Label />component, and pass some styling and binding thenameproperty to{this.state.name}. - We declare our
<Input />component, we bind ouronChangeproperty event handler to our componenthandleChangemethod. - Finally we return our component markup.
Render the component
| |
Finally we render the component inside our <div id=container></div> declared element in the index.html file.
The result
ES6 ?
Since React 0.13.1 beta 1 React ship with ES6 support.
In React 0.13.0 you no longer need to use React.createClass to create React components. If you have a transpiler you can use ES6 classes today. You can use the transpiler we ship with react-tools by making use of the harmony option: jsx –harmony.
Refactor our component to ES6 classes
So the code will look like this:
{% jsfiddle jwm6k66c js %}
Where to go from here
Read the documentation, fork the jsfiddle code snippets and play with them. Visit the links in the resources section below.